OpenCV
OpenCV java/kotlin
安装
使用Maven仓库(推荐)
libs.versions.toml
[versions]
opencv = "4.10.0"

[libraries]
opencv = { group = "org.opencv", name = "opencv", version.ref = "opencv" }build.gradle.kts
implementation(libs.opencv)注意!安卓也可以用这个库
JVM初始化:
System.loadLibrary(Core.NATIVE_LIBRARY_NAME)安卓初始化:
OpenCVLoader.initLocal()手动安装
进入OpenCV Release,选择Windows,等待下载完成后解压到合适的文件夹。
打开项目的build.gradle.kts文件,在dependices里添加
// OpenCV
implementation(files("""【这里替换成OpenCV的根目录】\build\java\opencv-490.jar"""))初始化:
System.load("""【这里替换成OpenCV的根目录】\build\java\x64\opencv_java490.dll""")使用到的图片预览
![]()

Hello World
在使用OpenCV前先要加载动态链接库 System.load("""【这里替换成OpenCV的根目录】\build\java\x64\opencv_java490.dll""")
import org.opencv.core.Core
import org.opencv.highgui.HighGui.imshow
import org.opencv.highgui.HighGui.waitKey
import org.opencv.imgcodecs.Imgcodecs.imread

fun main() {
    // 加载OpenCV动态链接库
    System.load("""E:\softwares\opencv\build\java\x64\opencv_java490.dll""")
    // 打印OpenCV版本
    println(Core.getVersionString())
    // 读取图片
    val image = imread("./src/main/kotlin/OpenCV/opencv_logo.jpg")
    // 打印图片信息(宽高,通道数等)
    println(image)
    // 显示图片
    imshow("窗口标题", image)
    // 等待键盘输入,防止闪一下图片就退出
    waitKey()
}颜色 color
对于OpenCV来说,一张彩色图等于三张灰度图。颜色顺序为BGR
灰度图:明暗程度(可以说是相机CMOS上光子数量的分布图)
蓝绿红通道和灰度图
import org.opencv.core.Core
import org.opencv.core.Mat
import org.opencv.highgui.HighGui.imshow
import org.opencv.highgui.HighGui.waitKey
import org.opencv.imgcodecs.Imgcodecs
import org.opencv.imgcodecs.Imgcodecs.imread
import org.opencv.imgproc.Imgproc

fun main() {
    // 加载OpenCV动态链接库
    System.load("""E:\softwares\opencv\build\java\x64\opencv_java490.dll""")
    val image = imread("./src/main/kotlin/OpenCV/opencv_logo.jpg")
    imshow("蓝", image.blue())
    imshow("绿", image.green())
    imshow("红", image.red())
    imshow("灰", image.gray())
    waitKey()
}

// 对于OpenCV来说,一张彩色图等于三张灰度图。颜色顺序为BGR
// 提取指定通道
fun Mat.getChannel(channel: Int): Mat {
    val mat = Mat()
    Core.extractChannel(this, mat, channel)
    return mat
}

// 提取蓝色通道,对应Python的image[:,:,0]
fun Mat.blue(): Mat {
    return getChannel(0)
}

// 提取绿色通道,对应Python的image[:,:,1]
fun Mat.green(): Mat {
    return getChannel(1)
}

// 提取红色通道,对应Python的image[:,:,2]
fun Mat.red(): Mat {
    return getChannel(2)
}

// 获取灰度图
fun Mat.gray(): Mat {
    val mat = Mat()
    Imgproc.cvtColor(this, mat, Imgproc.COLOR_BGR2GRAY)
    return mat
}

// 获取灰度图
fun gray(path: String): Mat = imread(path, Imgcodecs.IMREAD_GRAYSCALE)纯色图
方式一:Mat(int rows, int cols, int type, Scalar s),它的参数是行数,列数,通道值,颜色值
方式二:Mat(Size(double width , double height,) int type, Scalar s),它的参数是Size(宽, 高),通道值,颜色值 方式三:将已有Mat对象设置为纯色图 Mat对象.setTo(Scalar s)
// 单通道纯白图
val white1D1 = Mat(1920, 1080, CvType.CV_8UC1, Scalar(255.0))
val white1D2 = Mat(Size(1080.0, 1920.0), CvType.CV_8UC1, Scalar(255.0))
// 单通道纯黑图
val black1D = Mat(1920, 1080, CvType.CV_8UC1, Scalar(0.0))
// 三通道纯粉色图
val pink3D = Mat(Size(1080.0, 1920.0), CvType.CV_8UC3, Scalar(104.0,122.0,191.0))

// 创建新Mat并设置为淡蓝色
val lightblue = Mat(Size(1080.0, 1920.0), CvType.CV_8UC3).setTo(Scalar(191.0, 122.0, 104.0))
// 将已有图像设置为淡蓝色
val logo = imread("./src/main/kotlin/OpenCV/opencv_logo.jpg").setTo(Scalar(191.0, 122.0, 104.0))切割 crop
请注意 submat() 和 setTo()都是直接在原图上操作。要想不改变原图,请使用 clone()
import org.opencv.highgui.HighGui.imshow
import org.opencv.highgui.HighGui.waitKey
import org.opencv.imgcodecs.Imgcodecs.imread
fun main() {
System.load("""E:\softwares\opencv\build\java\x64\opencv_java490.dll""")
val image = imread("./src/main/kotlin/OpenCV/opencv_logo.jpg")
// 切割图片 public Mat submat(int rowStart, int rowEnd, int colStart, int colEnd)
val cropped = image.submat(10, 170, 40, 200)
imshow("cropped", cropped)
// 切割图片,并将切割的部分设置为绿色,原图操作
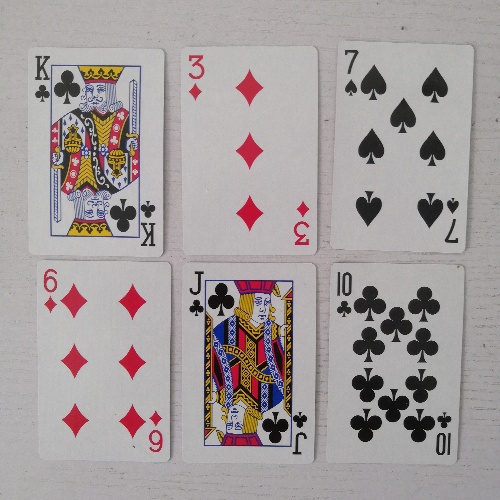
val poker = imread("./src/main/kotlin/OpenCV/poker.jpg")
poker.submat(70, 200, 20, 200).setTo(Scalar(0.0, 255.0, 0.0))
imshow("poker", poker)
// 切割图片,并将切割的部分设置为绿色,克隆原图再操作
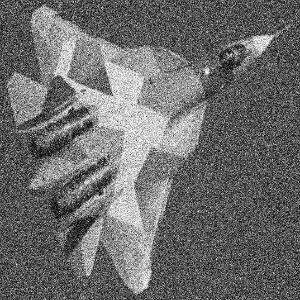
val plane = imread("./src/main/kotlin/OpenCV/plane.jpg")
val clonedPlane = plane.clone()
clonedPlane.submat(70, 200, 20, 200).setTo(Scalar(0.0, 255.0, 0.0))
imshow("plane", plane)
imshow("clonedPlane", clonedPlane)
waitKey()
}绘制 draw
import org.opencv.core.CvType
import org.opencv.core.Mat
import org.opencv.core.Point
import org.opencv.core.Scalar
import org.opencv.highgui.HighGui.imshow
import org.opencv.highgui.HighGui.waitKey
import org.opencv.imgproc.Imgproc

fun main() {
    System.load("""E:\softwares\opencv\build\java\x64\opencv_java490.dll""")
    // Scalar是OpenCV中用于表示颜色的结构体。1个参数表示灰度值,3个参数表示RGB,4个参数表示RGBA
    // 创建一个300*300的Mat,通道数为3,每个通道8位,初始化值为0
    val image = Mat(300, 300, CvType.CV_8UC3, Scalar(0.0))
    val blue = Scalar(255.0, 0.0, 0.0)
    val green = Scalar(0.0, 255.0, 0.0)
    val red = Scalar(0.0, 0.0, 255.0)
    val white = Scalar(255.0, 255.0, 255.0)
    // 画线,参数为图像,起点,终点,颜色,线宽
    Imgproc.line(image, Point(100.0, 200.0), Point(250.0, 250.0), blue, 2)
    // 画矩形,参数为图像,左上角,右下角,颜色,线宽
    Imgproc.rectangle(image, Point(30.0, 100.0), Point(60.0, 150.0), green, 2)
    // 画圆,参数为图像,圆心,半径,颜色,线宽
    Imgproc.circle(image, Point(150.0, 100.0), 20, red, 3)
    // 画文字,参数为图像,文字,起点,字体,字体大小,颜色,线宽,线条类型
    Imgproc.putText(image, "hello", Point(100.0, 50.0), Imgproc.FONT_HERSHEY_SIMPLEX, 1.0, white, 2, Imgproc.LINE_AA)
    imshow("画图", image)
    waitKey()
}模糊 blur
import org.opencv.core.Mat
import org.opencv.core.Size
import org.opencv.highgui.HighGui.imshow
import org.opencv.highgui.HighGui.waitKey
import org.opencv.imgcodecs.Imgcodecs.imread
import org.opencv.imgproc.Imgproc

fun main() {
    System.load("""E:\softwares\opencv\build\java\x64\opencv_java490.dll""")
    val source = imread("./src/main/kotlin/OpenCV/plane.jpg")

    val gauss = Mat()
    // 高斯模糊,参数:原图,目标图,核大小,标准差
    Imgproc.GaussianBlur(source, gauss, Size(5.0, 5.0), 0.0)

    // 中值模糊
    val median = Mat()
    // 参数:原图,目标图,核大小
    Imgproc.medianBlur(source, median, 5)

    imshow("原图", source)
    imshow("高斯滤波", gauss)
    imshow("中值滤波", median)
    waitKey()
}特征点 corner
import org.opencv.core.MatOfPoint
import org.opencv.core.Point
import org.opencv.core.Scalar
import org.opencv.highgui.HighGui.imshow
import org.opencv.highgui.HighGui.waitKey
import org.opencv.imgcodecs.Imgcodecs.imread
import org.opencv.imgproc.Imgproc

fun main() {
    System.load("""E:\softwares\opencv\build\java\x64\opencv_java490.dll""")
    val image = imread("./src/main/kotlin/OpenCV/opencv_logo.jpg")
    // 灰度图
    val gray = image.gray()

    // 检测特征点
    val corners = MatOfPoint()
    // 参数:原图,特征点,最大特征点数,最小特征点质量,特征点之间的最小距离
    Imgproc.goodFeaturesToTrack(gray, corners, 500, 0.1, 10.0)

    // 绘制特征点
    for (corner in corners.toArray()) {
        Imgproc.circle(image, Point(corner.x, corner.y), 3, Scalar(255.0, 0.0, 255.0), -1)
    }

    // 显示图像
    imshow("corners", image)
    waitKey()
}匹配模板 match
matchTemplate 匹配模板
Imgproc.matchTemplate 是 OpenCV Java 接口中的一个方法,属于 Imgproc 类的一部分。它用于图像模板匹配,即在图像中寻找与模板匹配的部分。该方法通常用于图像识别、图像定位等任务。
public static void matchTemplate(Mat image, Mat templ, Mat result, int method)- Mat image:源图像(待搜索的图像, 必须是灰度图)。
- Mat templ:模板图像(用于匹配的图像, 必须是灰度图)。
- Mat result:结果存储的目标图像(匹配结果的图像)。
- int method:匹配方法
- TM_SQDIFF:平方差匹配法。计算平方差,值越小匹配度越高。
- TM_SQDIFF_NORMED:归一化平方差匹配法。
- TM_CCORR:相关匹配法。计算相关性,值越大匹配度越高。
- TM_CCORR_NORMED:归一化相关匹配法。
- TM_CCOEFF:相关系数匹配法。计算相关系数,值越大匹配度越高。
- TM_CCOEFF_NORMED:归一化相关系数匹配法。把待检测图像和模板都标准化,再计算匹配度,保证匹配结果不收光照强度的影响,匹配越接近1,说明匹配越准确。
/**
 * 扩展函数,匹配模板
 * @param [this] 原图(必须是灰度图)
 * @param [template] 模板(必须是灰度图),用于在原图中匹配模板
 * @param [mask] 可选参数,用于定义模板图像的掩码。如果提供了掩码,那么只有模板图像中的非零像素才会被用于匹配
 * @param [method] 匹配方法, 默认为Imgproc.TM_CCOEFF_NORMED
 * @return 返回匹配结果的Mat图像
 */
fun Mat.match(template: Mat, mask: Mat? = null, method: Int = Imgproc.TM_CCOEFF_NORMED): Mat =
    Mat().also {
        if (mask == null) {
            Imgproc.matchTemplate(this, template, it, method)
        } else {
            Imgproc.matchTemplate(this, template, it, method, mask)
        }
}minMaxLoc 查找矩阵中的最小值和最大值以及它们的位置
Core.minMaxLoc 是 OpenCV 库中的一个函数,用于查找矩阵或图像中元素的最小值和最大值及其位置。这个函数对分析图像数据非常有用,例如在图像处理和计算机视觉任务中,可以帮助找到特定特征的位置和数值范围。
public static MinMaxLocResult minMaxLoc(Mat src, Mat mask)src:输入矩阵(Mat),即要在其中查找最小值和最大值的图像或数据矩阵。mask(可选):操作掩码。它必须是与输入图像尺寸相同的 8 位单通道数组。它指定哪些元素将被包含在计算中。如果没有指定,则对所有元素进行计算。
该函数返回一个 MinMaxLocResult 对象,包含以下信息:
- minVal:输入矩阵中找到的最小值。
- maxVal:输入矩阵中找到的最大值。
- minLoc:最小值的位置(Point 类型)。
- maxLoc:最大值的位置(Point 类型)。
/**
 * 查找矩阵中的最小值和最大值以及它们的位置。
 *
 * @param [this] Mat对象(必须是灰度图)
 * @return Core.MinMaxLocResult对象
 */
fun Mat.minMaxLoc(): Core.MinMaxLocResult = Core.minMaxLoc(this)threshold 阈值
Imgproc.threshold 是 OpenCV Java 接口中的一个方法,属于 Imgproc 类的一部分。它用于图像阈值处理,这是图像处理中用来将灰度图像转换为二值图像的一种技术。
public static double threshold(Mat src, Mat dst, double thresh, double maxval, int type)- src:输入图像(单通道灰度图像)。
- dst:结果存储的目标图像(二值图像)。
- thresh:阈值。
- maxval:与 THRESH_BINARY 和 THRESH_BINARY_INV 阈值类型一起使用的最大值。
- type:阈值类型,有以下几种选项:
- Imgproc.THRESH_BINARY:二进制阈值化。大于等于阈值的像素设为 maxval,小于阈值的设为 0。
- Imgproc.THRESH_BINARY_INV:反二进制阈值化。与二进制阈值化相反。
- Imgproc.THRESH_TRUNC:截断阈值化。大于阈值的像素设为阈值,小于阈值的保持不变。
- Imgproc.THRESH_TOZERO:阈值化为 0。大于阈值的像素保持不变,小于阈值的设为 0。
- Imgproc.THRESH_TOZERO_INV:反阈值化为 0。与阈值化为 0 相反。
- Imgproc.THRESH_OTSU:使用 Otsu 方法自动确定最佳阈值并应用阈值
/**
 * 扩展函数,用于对 Mat 对象进行阈值处理。
 *
 * @param [this] 原图(必须是灰度图)
 * @param threshold 阈值。
 * @param maxVal 最大值,默认为 255.0。
 * @param type 阈值处理类型,默认为 Imgproc.THRESH_TOZERO。
 * @return 经过阈值处理后的 Mat 对象。
 */
fun Mat.threshold(threshold: Double, maxVal: Double = 255.0, type: Int = Imgproc.THRESH_BINARY): Mat =
Mat().also { Imgproc.threshold(this, it, threshold, maxVal, type) }findNonZero 查找非零元素
Core.findNonZero 是 OpenCV 库中的一个方法,用于查找非零像素的位置。此方法特别适用于二值图像(即包含黑白像素的图像),它可以返回所有非零像素的坐标列表。该方法通常用于图像处理和分析任务,例如对象检测、图像分割等。
public static void findNonZero(Mat src, Mat dst)- Mat src: 源图像,通常是一个单通道的二值图像。
- Mat dst: 目标 Mat 对象,用于存储非零像素的位置。这是一个单列矩阵,每行代表一个非零像素的位置。
/**
 * 扩展函数,查找非零像素的位置。
 *
 * @param [this] 原图(必须是灰度图)
 * @return 存储非零像素的位置的 MatOfPoint 对象
 */
fun Mat.findNonZero(): MatOfPoint = MatOfPoint().also { Core.findNonZero(this, it) }groupRectangles 分组
用于将候选的矩形对象进行分组
public static void groupRectangles(MatOfRect rectList, MatOfInt weights, int groupThreshold, double eps)- rectList 是一个包含候选矩形的列表。
- weights 是一个整数列表,用于存储每个矩形的权重。函数执行后,这个列表将被更新为每个矩形所在组的矩形数量。
- groupThreshold 是一个整数,表示一个组中需要的最小矩形数量1。只有当一个组中的矩形数量大于或等于groupThreshold时,该组才会被保留1。
- eps 是一个浮点数,用于控制矩形的相似度1。当eps为0时,不进行任何分组。默认值为 0.2
// 矩形分组,不改变原始MatOfRect
fun MatOfRect.grouped(threshold: Int = 1, eps: Double = 0.2): Pair<MatOfRect, MatOfInt> {
    val rectList = MatOfRect(clone())
    val weights = MatOfInt()
    Objdetect.groupRectangles(rectList, weights, threshold, eps)
    return rectList to weights
}

// 矩形分组,改变原始MatOfRect
fun MatOfRect.group(threshold: Int = 1, eps: Double = 0.2): Pair<MatOfRect, MatOfInt> {
    val weights = MatOfInt()
    Objdetect.groupRectangles(this, weights, threshold, eps)
    return this to weights
}实战
查找最佳匹配的坐标
kotlinfun Mat.bestMatchPoint(template: Mat): Point = match(template).minMaxLoc().maxLoc返回所有大于阈值的点
先匹配模板,再二值化,最后找出非零点
kotlinfun Mat.matchedPoints(template: Mat, threshold: Double, method: Int = Imgproc.TM_CCOEFF_NORMED): List<Point> { return match(template, method).threshold(threshold).findNonZero().toList() }
查找轮廓 findContours
Imgproc.findContours 是 OpenCV 库中的一个函数,用于检测图像中的轮廓。轮廓可以看作是连接具有相同颜色或强度的所有连续点的曲线。它在图像处理和计算机视觉中有着广泛的应用,比如物体检测、形状分析和图像分割。
参数说明
- image: 输入图像。必须是单通道的二值图像(例如,通过阈值化或边缘检测得到)。该图像在函数执行后会被修改,通常作为标记图像使用。
- contours: 用于存储检测到的轮廓的列表。每个轮廓都表示为一个 MatOfPoint,即点的集合。
- hierarchy: 用于存储轮廓的拓扑信息。它是一个 Mat 类型的矩阵。可以为空,但如果不为空,则其大小应该是 (n, 4),其中 n 是检测到的轮廓数量。
- mode: 轮廓检索模式。可以是以下值之一:
- RETR_EXTERNAL: 只检索最外层的轮廓。
- RETR_LIST: 检索所有的轮廓,但不建立任何层次关系。
- RETR_CCOMP: 检索所有的轮廓,并将它们组织成两层:顶层是外部边界,次层是空洞的边界。
- RETR_TREE: 检索所有的轮廓,并重建完整的层次结构。
- method: 轮廓近似方法。可以是以下值之一:
- CHAIN_APPROX_NONE: 存储所有的轮廓点。
- CHAIN_APPROX_SIMPLE: 仅存储轮廓的端点部分,从而可以大大减少需要存储的点数。
使用步骤
- 读取图像:使用 Imgcodecs.imread 读取输入图像。
- 转换为灰度图像:使用 Imgproc.cvtColor 将彩色图像转换为灰度图像。
- 应用阈值化:使用 Imgproc.threshold 将灰度图像转换为二值图像。
- 检测轮廓:使用 Imgproc.findContours 检测二值图像中的轮廓。
- 绘制轮廓:使用 Imgproc.drawContours 在原始图像上绘制检测到的轮廓。
- 显示结果:使用 HighGui.imshow 显示结果图像。
fun Mat.findContours(
    mode: Int = Imgproc.RETR_LIST,
    method: Int = Imgproc.CHAIN_APPROX_SIMPLE,
    offset: Point? = null
): Pair<List<MatOfPoint>, Mat> {
    val contours = mutableListOf<MatOfPoint>()
    val hierarchy = Mat()
    if (offset == null) {
        Imgproc.findContours(this, contours, hierarchy, mode, method)
    } else {
        Imgproc.findContours(this, contours, hierarchy, mode, method, offset)
    }
    return contours.toList() to hierarchy
}泛洪填充 floodFill
Imgproc.floodFill 是 OpenCV 中用于填充连接区域的函数,它可以用于图像分割、区域标记等应用。该函数类似于画图软件中的油漆桶工具,可以填充从某个种子点开始的所有相连区域。
参数说明
- image: 输入/输出图像。填充操作将在此图像上进行。该图像会被修改。
- mask: 掩码图像,用于控制填充操作的区域。可以为空。如果提供掩码图像,它的大小应比输入图像大两个像素(宽和高都要加2),并且应初始化为0。填充操作只在掩码图像中值为0的区域进行。
- seedPoint: 种子点,从此点开始进行填充。
- newVal: 填充颜色,用于填充区域。
- rect: 返回填充区域的最小边界矩形(可以为空)。
- loDiff: 当前像素与种子点或连接像素之间的亮度或颜色之差的下界。
- upDiff: 当前像素与种子点或连接像素之间的亮度或颜色之差的上界。
- flags: 用于指定填充模式的标志。可能的值包括:
- FLOODFILL_FIXED_RANGE:当前像素与种子像素比较,否则与邻域像素比较。
- FLOODFILL_MASK_ONLY:仅填充掩码图像,不修改输入图像。
public static int floodFill(Mat image, Mat mask, Point seedPoint, Scalar newVal, Rect rect, Scalar loDiff, Scalar upDiff, int flags)梯度 gradient
import org.opencv.core.Core
import org.opencv.core.CvType
import org.opencv.core.Mat
import org.opencv.highgui.HighGui.imshow
import org.opencv.highgui.HighGui.waitKey
import org.opencv.imgcodecs.Imgcodecs.imread
import org.opencv.imgproc.Imgproc

fun main() {
    System.load("""E:\softwares\opencv\build\java\x64\opencv_java490.dll""")
    val image = imread("./src/main/kotlin/OpenCV/opencv_logo.jpg").gray()
    val laplacian = Mat()
    // 拉普拉斯算子,大致对应图象的二阶导数
    Imgproc.Laplacian(image, laplacian, CvType.CV_64F)

    val laplacian8U = Mat()
    // HighGui.imshow()无法显示64位浮点数,需要转换为8位整型
    Core.convertScaleAbs(laplacian, laplacian8U)

    val canny = Mat()
    // 边缘检测
    Imgproc.Canny(image, canny, 100.0, 200.0)

    imshow("laplacian", laplacian8U)
    imshow("canny", canny)
    imshow("image", image)
    waitKey()
}阈值 threshold
阈值也即二值化
import org.opencv.core.Mat
import org.opencv.highgui.HighGui.imshow
import org.opencv.highgui.HighGui.waitKey
import org.opencv.imgproc.Imgproc

fun main() {
    System.load("""E:\softwares\opencv\build\java\x64\opencv_java490.dll""")
    val gray = gray("./src/main/kotlin/OpenCV/bookpage.jpg")

    val dest = Mat()
    // 阈值(二值化),参数:原图,目标图,阈值,最大值,二值化模式
    Imgproc.threshold(gray, dest, 10.0, 255.0, Imgproc.THRESH_BINARY)

    val adaptive = Mat()
    // 自适应阈值,参数:原图,目标图,最大值,二值化模式,自适应模式,自适应窗口大小,自适应常数
    Imgproc.adaptiveThreshold(gray, adaptive, 255.0, Imgproc.ADAPTIVE_THRESH_GAUSSIAN_C, Imgproc.THRESH_BINARY, 115, 1.0)

    val otsu = Mat()
    // OTSU阈值,参数:原图,目标图,阈值,最大值,二值化模式
    Imgproc.threshold(gray, otsu, 0.0, 255.0, Imgproc.THRESH_BINARY + Imgproc.THRESH_OTSU)

    imshow("dest", dest)
    imshow("adaptive", adaptive)
    imshow("otsu", otsu)
    waitKey()
}形态学 morphology
import org.opencv.core.CvType
import org.opencv.core.Mat
import org.opencv.core.Size
import org.opencv.highgui.HighGui.imshow
import org.opencv.highgui.HighGui.waitKey
import org.opencv.imgproc.Imgproc

fun main() {
    System.load("""E:\softwares\opencv\build\java\x64\opencv_java490.dll""")
    val image = gray("./src/main/kotlin/OpenCV/opencv_logo.jpg")

    // 阈值/二值化
    val threshold = Mat()
    Imgproc.threshold(image, threshold, 200.0, 255.0, Imgproc.THRESH_BINARY_INV)

    // 创建一个5*5的核
    val kernel = Mat.ones(Size(5.0, 5.0), CvType.CV_8U)

    // 腐蚀
    val erosion = Mat()
    Imgproc.erode(threshold, erosion, kernel)

    // 膨胀
    val dilation = Mat()
    Imgproc.dilate(threshold, dilation, kernel)

    imshow("dest", threshold)
    imshow("erosion", erosion)
    imshow("dilation", dilation)
    waitKey()
}扩展函数
// 获取灰度图,改变原始Mat
fun Mat.gray(): Mat = apply {
    if (channels() != 1) {
        Imgproc.cvtColor(this, this, Imgproc.COLOR_BGR2GRAY)
    }
}


// 获取灰度图,不改变原始Mat
fun Mat.grayed(): Mat = if (channels() == 1) {
    clone()
} else {
    Mat().also { Imgproc.cvtColor(this, it, Imgproc.COLOR_BGR2GRAY) }
}


// 匹配模板,改变原始Mat
fun Mat.match(template: Mat, mask: Mat? = null, method: Int = Imgproc.TM_CCOEFF_NORMED): Mat = apply {
    if (mask == null) {
        Imgproc.matchTemplate(this, template, this, method)
    } else {
        Imgproc.matchTemplate(this, template, this, method, mask)
    }
}


// 匹配模板,不改变原始Mat
fun Mat.matched(template: Mat, mask: Mat? = null, method: Int = Imgproc.TM_CCOEFF_NORMED): Mat = Mat().also {
    if (mask == null) {
        Imgproc.matchTemplate(this, template, it, method)
    } else {
        Imgproc.matchTemplate(this, template, it, method, mask)
    }
}


// 最大最小值
fun Mat.minMaxLoc(): Core.MinMaxLocResult = Core.minMaxLoc(this)


// 阈值,改变原始Mat
fun Mat.threshold(threshold: Double, maxVal: Double = 255.0, type: Int = Imgproc.THRESH_BINARY): Mat = apply {
    Imgproc.threshold(this, this, threshold, maxVal, type)
}


// 阈值,不改变原始Mat
fun Mat.thresholded(threshold: Double, maxVal: Double = 255.0, type: Int = Imgproc.THRESH_BINARY): Mat = Mat().also {
    Imgproc.threshold(this, it, threshold, maxVal, type)
}


// 非零点
fun Mat.findNonZero(): MatOfPoint = MatOfPoint().also { Core.findNonZero(this, it) }


// 轮廓结果
data class ContourResult(val contourList: List<MatOfPoint>, val hierarchy: Mat)


// 查找轮廓
fun Mat.findContours(
    mode: Int = Imgproc.RETR_LIST, method: Int = Imgproc.CHAIN_APPROX_SIMPLE, offset: Point? = null
): ContourResult {
    val contours = mutableListOf<MatOfPoint>()
    val hierarchy = Mat()
    if (offset == null) {
        Imgproc.findContours(this, contours, hierarchy, mode, method)
    } else {
        Imgproc.findContours(this, contours, hierarchy, mode, method, offset)
    }
    return ContourResult(contours, hierarchy)
}


// Point 转 Rect
fun Point.toRect(width: Int, height: Int): Rect = Rect(x.toInt(), y.toInt(), width, height)


// MatOfPoint 转 MatOfRect
fun MatOfPoint.toMatOfRect(width: Int, height: Int): MatOfRect =
    toArray().map { it.toRect(width, height) }
        .let { rects -> MatOfRect().apply { fromList(rects) } }


// Point 转 Rect的中心坐标
fun Point.toRectCenter(width: Int, height: Int): Point = Point(x + width / 2.0, y + height / 2.0)


// Rect的中心坐标
fun Rect.center(): Point = Point(x + width / 2.0, y + height / 2.0)


// 矩形分组结果
data class GroupResult(val rectList: List<Rect>, val weights: List<Int>)


// 矩形分组,改变原始MatOfRect
fun MatOfRect.group(threshold: Int = 1, eps: Double = 0.2): GroupResult {
    val weights = MatOfInt()
    Objdetect.groupRectangles(this, weights, threshold, eps)
    return GroupResult(toList(), weights.toList())
}


// 矩形分组,不改变原始MatOfRect
fun MatOfRect.grouped(threshold: Int = 1, eps: Double = 0.2): GroupResult {
    return MatOfRect(clone()).group(threshold, eps)
}


// 缩放,改变原始Mat
fun Mat.resize(size: Size, fx: Double = 0.0, fy: Double = 0.0, interpolation: Int = Imgproc.INTER_LINEAR) = apply {
    Imgproc.resize(this, this, size, fx, fy, interpolation)
}


// 缩放,不改变原始Mat
fun Mat.resized(size: Size, fx: Double = 0.0, fy: Double = 0.0, interpolation: Int = Imgproc.INTER_LINEAR): Mat =
    Mat().also { Imgproc.resize(this, it, size, fx, fy, interpolation) }


// 缩放到指定宽度
fun Mat.resizeWidthWithAspectRatio(width: Double, interpolation: Int = Imgproc.INTER_LINEAR) =
    resize(Size(width, width * height() / width()), interpolation = interpolation)


// 缩放到指定高度
fun Mat.resizeHeightWithAspectRatio(height: Double, interpolation: Int = Imgproc.INTER_LINEAR) =
    resize(Size(height * width() / height(), height), interpolation = interpolation)


// 画矩形,改变原始Mat
fun Mat.draw(
    rect: Rect,
    scalar: Scalar = Scalar(0.0, 255.0, 0.0),
    thickness: Int = 2,
    lineType: Int = Imgproc.LINE_8
): Mat = apply { Imgproc.rectangle(this, rect, scalar, thickness, lineType) }


// 画矩形,返回自身。会改变mat
fun Rect.drawOn(
    mat: Mat,
    scalar: Scalar = Scalar(0.0, 255.0, 0.0),
    thickness: Int = 2,
    lineType: Int = Imgproc.LINE_8
): Rect = apply { mat.draw(this, scalar, thickness, lineType) }


// 漫水填充
fun Mat.floodFill(startingPoint: Point, maxDiff: Double, newValue: Double): Mat = apply {
    Mat().use { mask ->
        Imgproc.floodFill(
            this,
            mask,
            startingPoint,
            Scalar(newValue),
            Rect(),
            Scalar(maxDiff),
            Scalar(maxDiff),
            Imgproc.FLOODFILL_FIXED_RANGE
        )
    }
}


// 释放Mat
inline fun <T : Mat, R> T.use(block: (T) -> R) = try {
    block(this)
} finally {
    release()
}使用
// 找到单个最佳匹配,并画矩形
image.clone()
    // 转为灰度图
    .gray()
    // 匹配
    .match(template.gray())
    // 最小最大值位置
    .minMaxLoc()
    // 最大值位置
    .maxLoc
    // 转为矩形
    .toRect(template.width(), template.height())
    // 画矩形
    .drawOn(image)


// 找到多个匹配,并画出矩形
resizedImage.clone()
    // 转为灰度图
    .gray()
    // 匹配
    .match(template.gray())
    // 二值化
    .threshold(0.8)
    // 非零点
    .findNonZero()
    // 转为矩形
    .toMatOfRect(template.width(), template.height())
    // 分组去重
    .group()
    // 获得去重后的MatOfRect
    .rectList
    // 遍历
    .forEach {
        // 画矩形
        it.drawOn(resizedImage)
    }